Adding and editing time entries
Create new time entries manually or modify existing time entries to make sure timesheets have the right details.

🎩 The ability to add and edit time entries is dependant on a user’s role and permissions:
|
Owners |
Team owners can modify anyone’s time entries. |
|
Admins |
By default, admins can modify anyone’s time entries. This permission can be disabled. |
|
Managers |
By default, managers can modify managed people’s time entries. This permission can be disabled. |
|
Members |
Members Can modify their own time entries if permission is enabled under Time Tracking settings. |
Whenever you track time, a time entry is created in your timesheet app. Read on to find out how you can manage and make modifications to new or existing time entries.
This article covers:
Editing & Deleting Time Entries
Adding Time Entries
❗️ Important: We recommend minimising manual entries and making time tracking a habit. Manually added entries are visibly marked as “Manual” to your managers.
You may want to add time entries:
-
As a manager for your team member
-
If you forgot to clock in
Steps to add a time entry
-
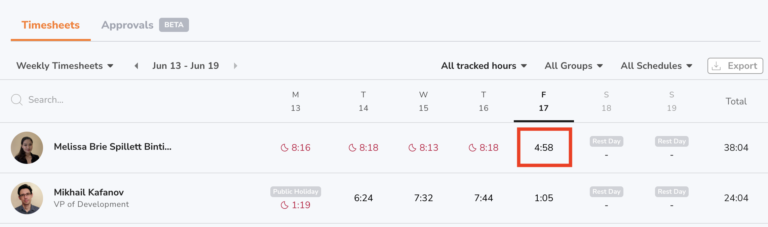
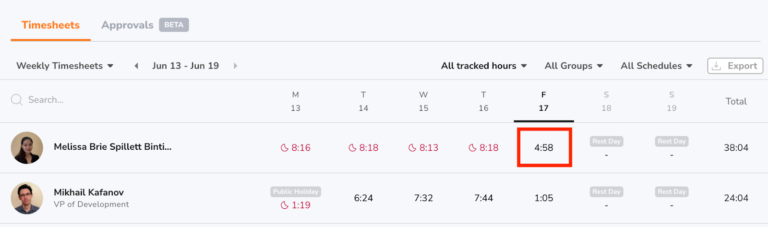
Go to the Timesheets.
-
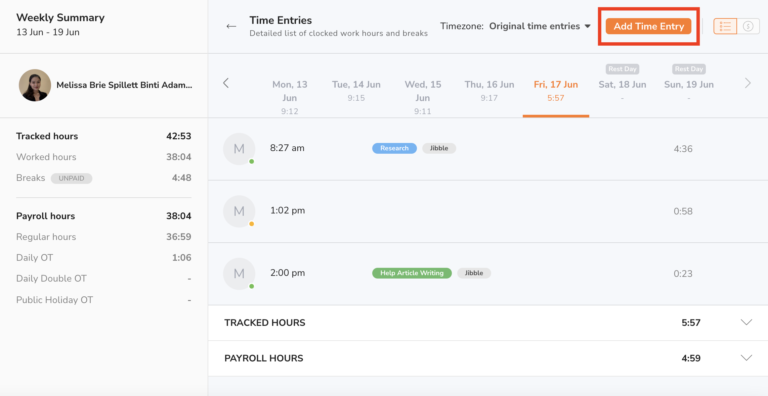
Click on any member’s hours to see their personal timesheet.

-
Click on Add Time Entry.
-
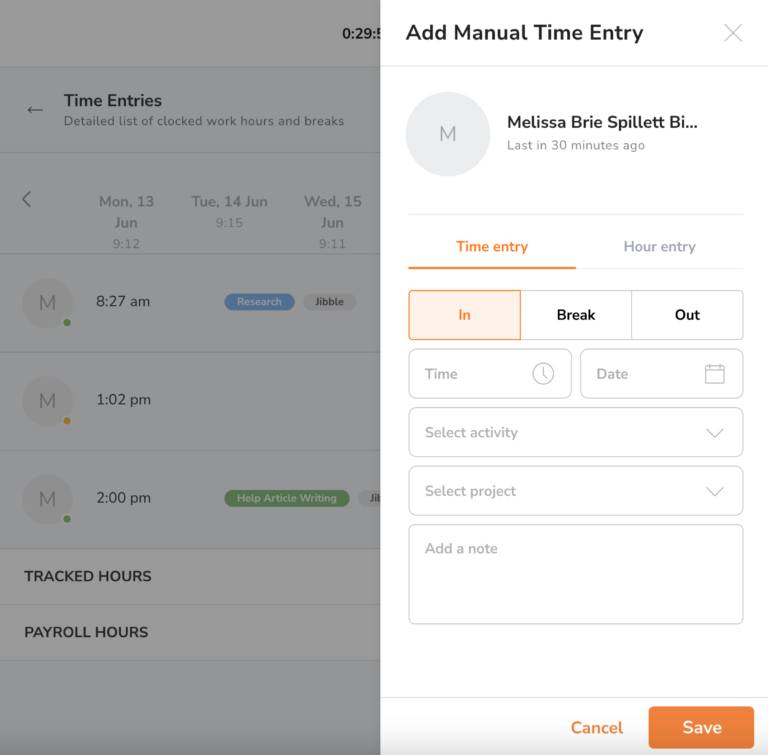
Choose Time Entry and the type of entry you want to add: In | Break | Out.
-
Fill in the details of your entry. This may vary based on the type of time entry and your organization’s settings.
-
Click on Save when you’re done.
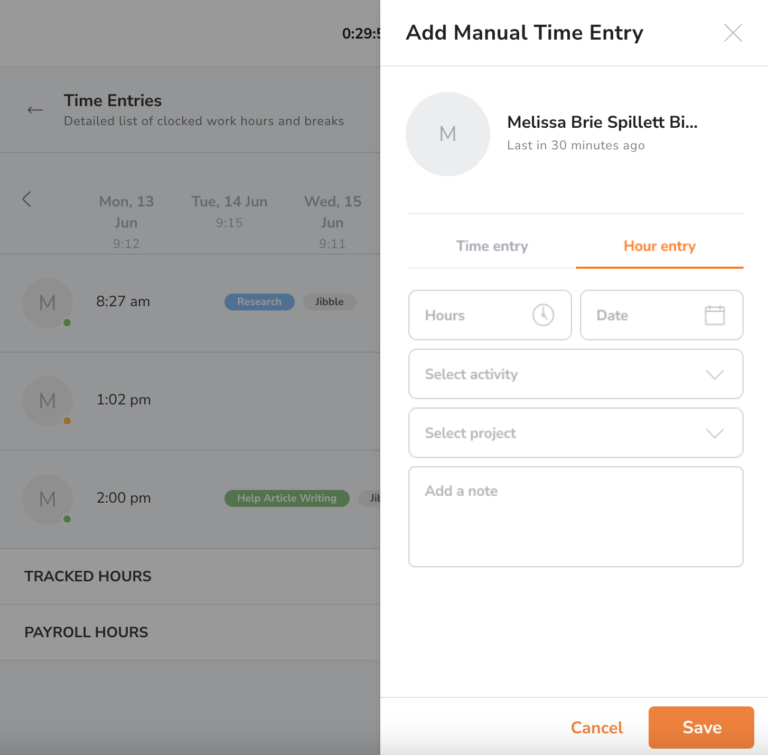
Adding Hour Entries
Add an hour entry if you would like to log hours retrospectively without a specific “In” or “Out” time.
Steps to add an hour entry
-
Go to the Timesheets.
-
Click on any member’s hours to see their personal timesheet.
-
Click on Add Time Entry.
-
Choose Hour Entry.
-
Fill in the details of your entry. This may vary based on the type of time entry and your organization’s settings.
-
Click on Save when you’re done.
Note: Each hour entry can only be added from a range of 0-24 hours. Users will be restricted from adding a duration of more than 24 hours.
Editing & Deleting Time Entries
Time entries can be edited to adjust a timestamp or to change the details included such as activities, projects, and notes.
Steps to edit a time entry
-
Go to Timesheets.
-
Click on a person to go into their personal detailed timesheets
-
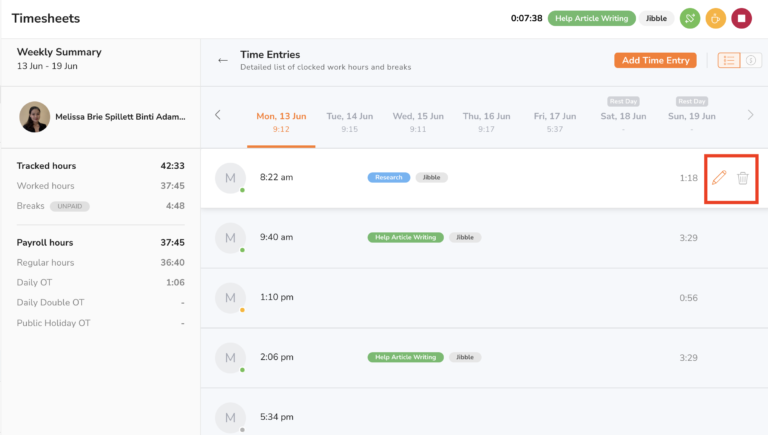
Locate the time entry to be changed.
-
Click on the Edit button.
-
In the detailed time entry, change the details as needed.
-
Click on Save when you are done.
-
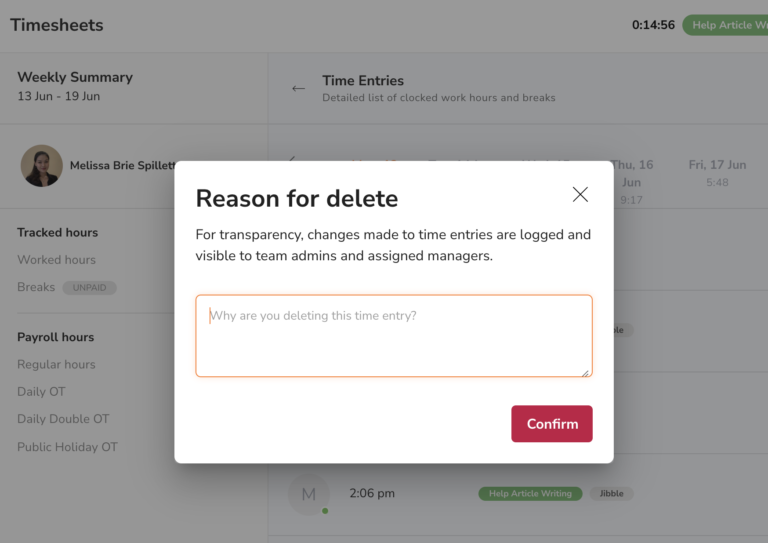
To keep track of changes made, specify a reason for making this change.
-
Click on Confirm for the change to take effect.
❗️ Important: Changes made to time entries will be recorded under “Change History” on daily timesheets and are visible to your managers.
Steps to delete a time entry
-
Go to Timesheets.
-
Click on a person to go into their personal detailed timesheets
-
Locate the time entry to be changed.
-
Click on the Delete button.
-
To keep track of changes made, specify a reason for making this change.
-
Click on Confirm for the change to take effect.
❗️ Important: Deleted time entries will not be included in calculations but will still be visibly marked in timesheets unless a member is permanently deleted.