Adding and editing time entries on mobile
Create manual time entries and edit existing time entries in Jibble's mobile app
🎩 This feature can only be used by:
|
Owners |
Team owners can modify anyone’s time entries. |
|
Admins |
By default, admins can modify anyone’s time entries. This permission can be disabled. |
|
Managers |
By default, managers can modify managed people’s time entries. This permission can be disabled. |
|
Members |
Members can modify their own time entries if permission is enabled under Time Tracking settings. |
Whenever you clock in, go on break or clock out, a time entry is created in your timesheets. Read on to find out how you can manage and make modifications to new or existing time entries in Jibble’s time clock app.
This article covers:
Adding Time Entries
❗️ Important: We recommend minimising manual entries and making time tracking a habit. Manually added entries are visibly marked as “Manual”.
You may want to add time entries:
-
As a manager for your team member
-
If you forgot to clock in
Steps to add a time entry
-
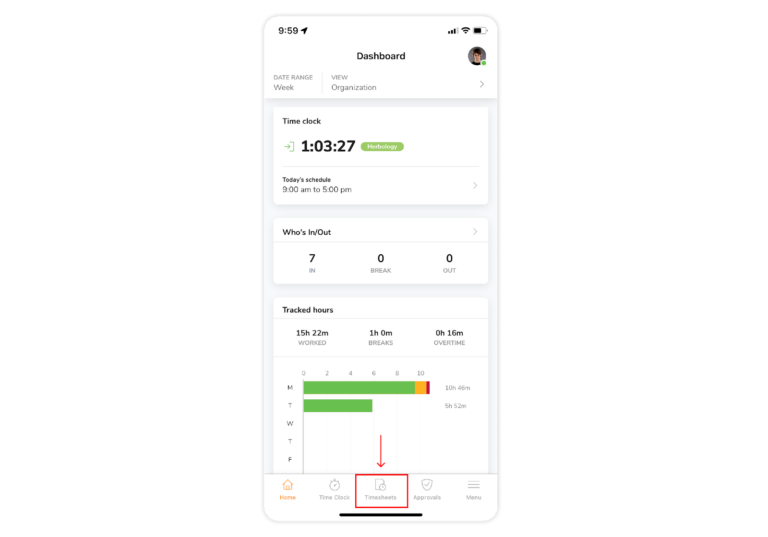
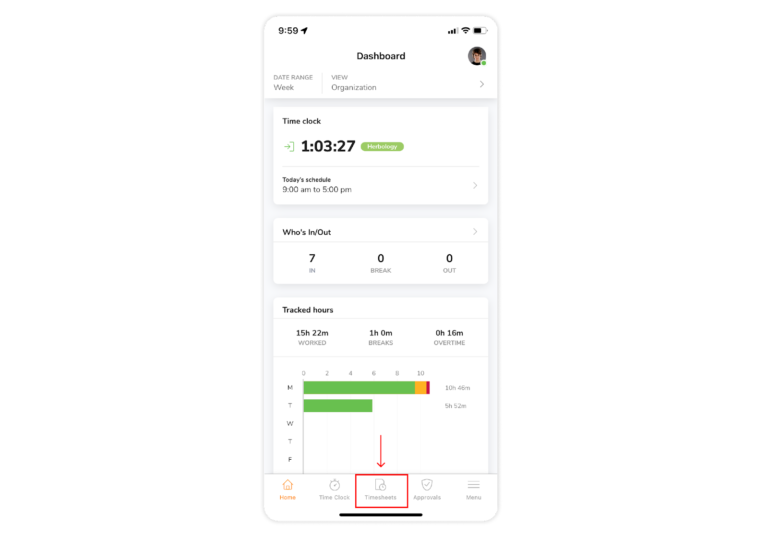
Go to Timesheets.

-
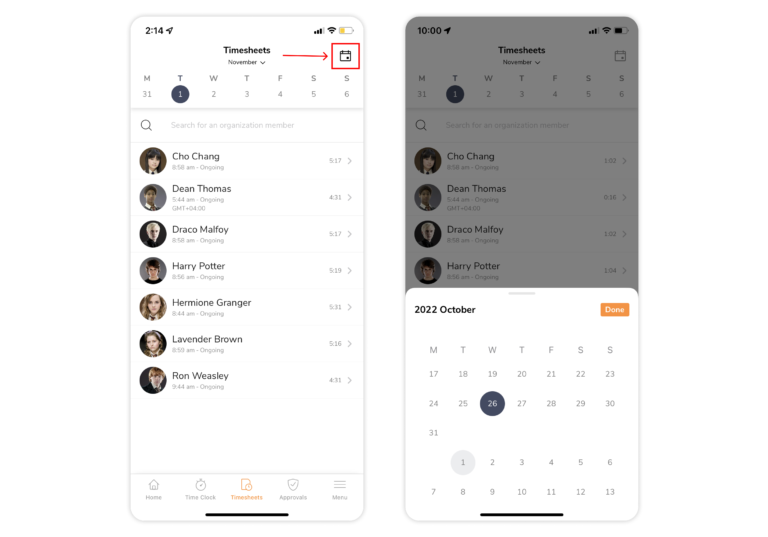
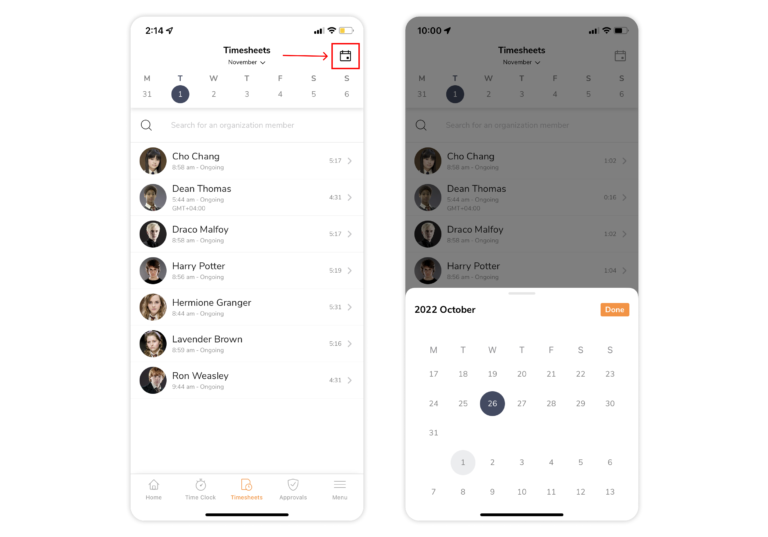
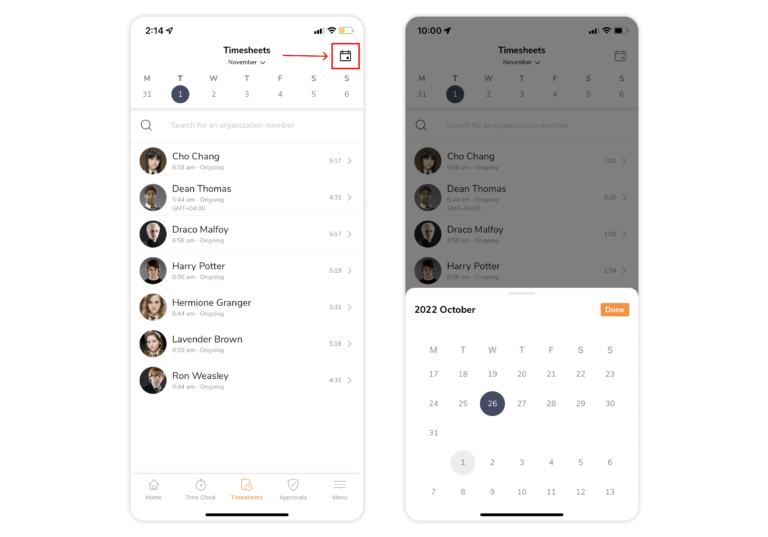
Click on the calendar icon on the top right corner to choose a particular day you wish to add a time entry for.

-
Click on Done.
-
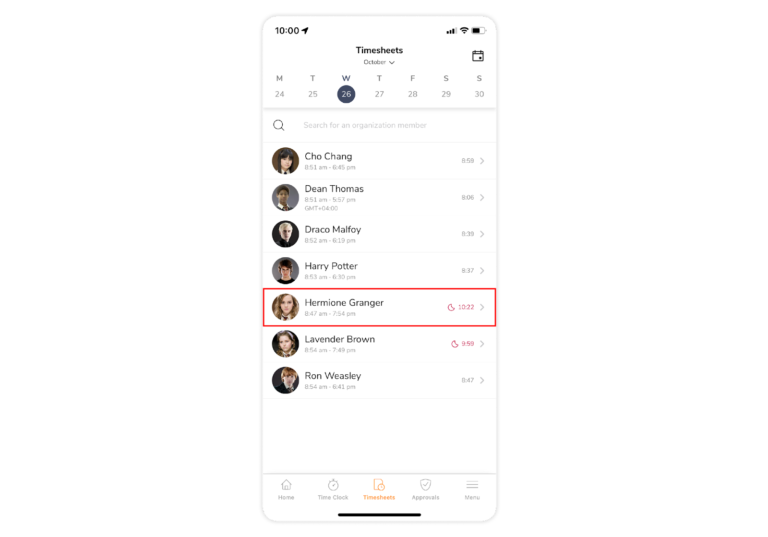
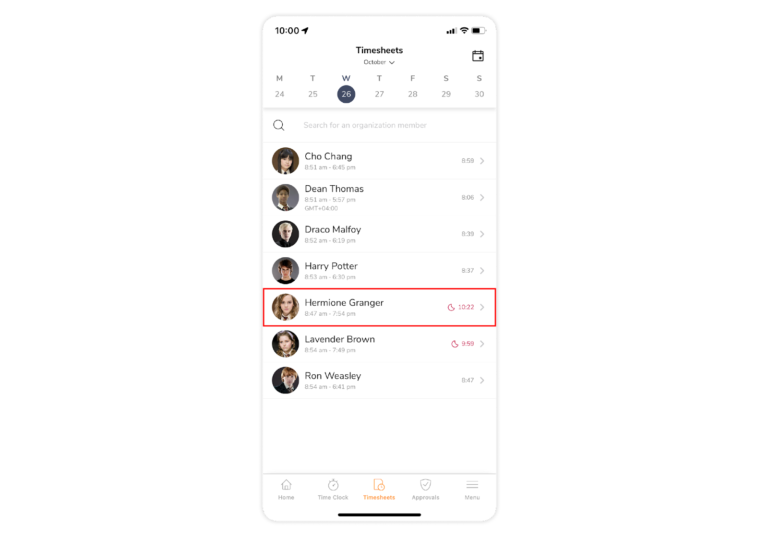
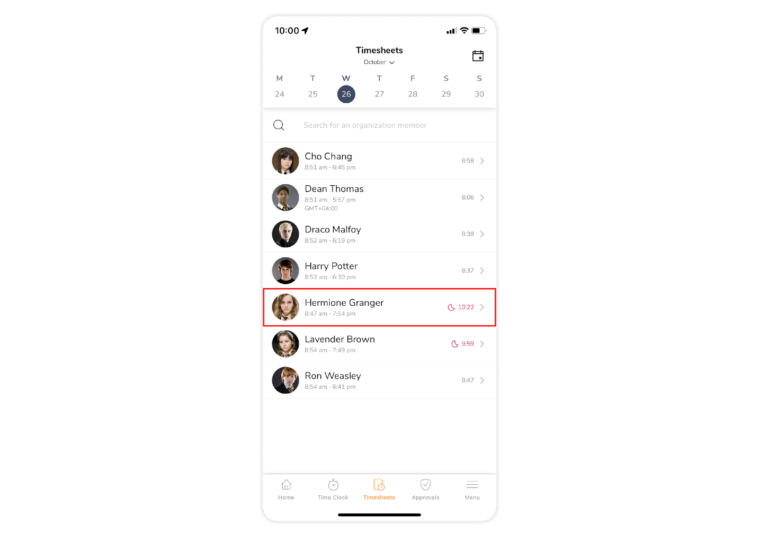
Select a member on the Timesheet list.

-
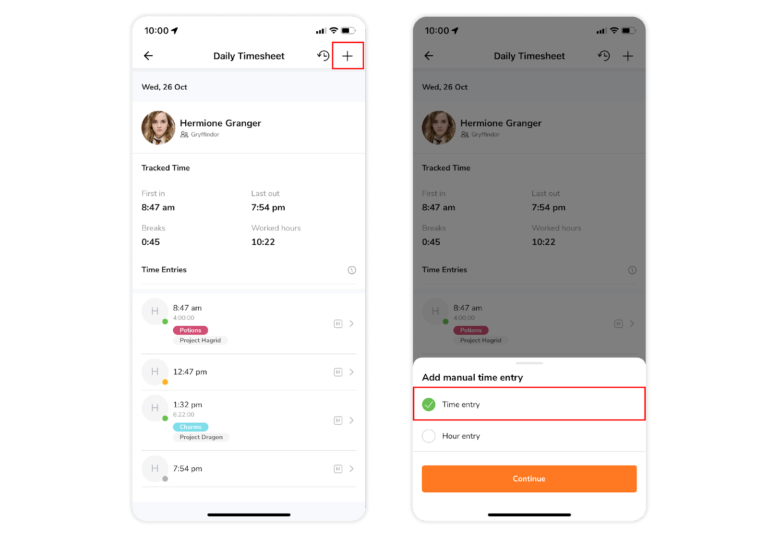
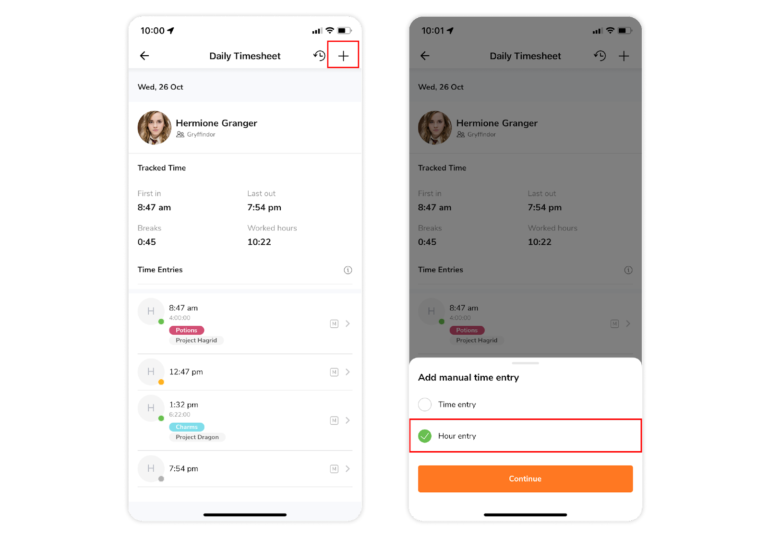
Click on the plus icon on the top right corner.
-
Select “Time entry” and tap on Continue.

-
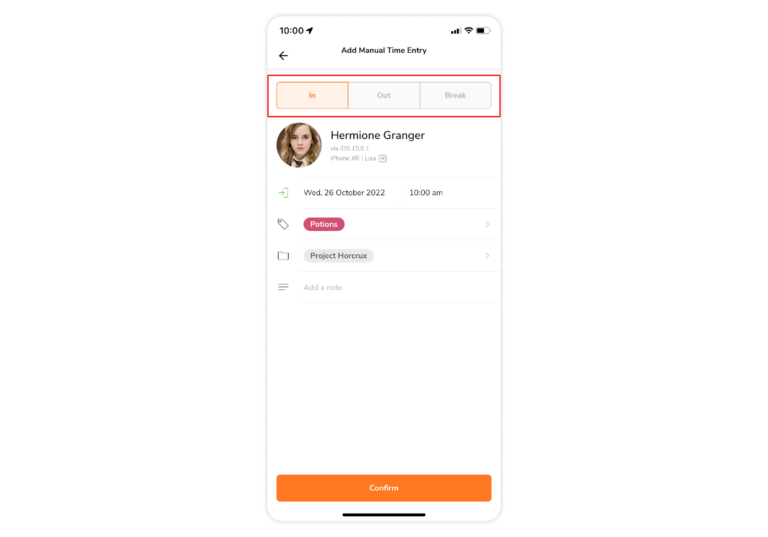
Choose the type of entry you want to add: In | Out | Break.

Note: Only one type of entry is permissible at a time, In and Out entries have to be added subsequently.
-
Fill in the details of your entry.
-
Click Confirm to log time.
Adding Hour Entries
Add an hour entry if you would like to log hours retrospectively without a specific “In” or “Out” time.
Steps to add an hour entry
-
Go to Timesheets.

-
Click on the calendar icon on the top right corner to choose a particular day you wish to add a time entry for.

-
Click on Done.
-
Select a member on the Timesheet list.

-
Click on the plus icon on the top right corner.
-
Select “Hour entry” and tap on Continue.

-
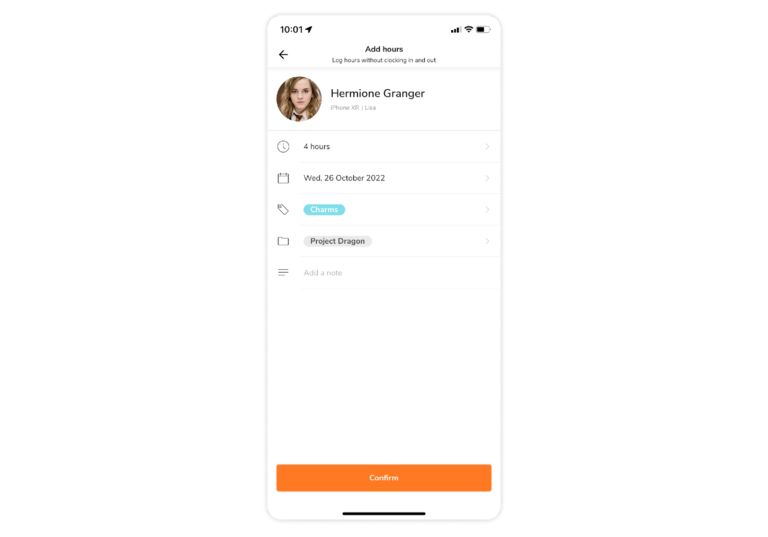
Fill in the details of your entry.

-
Click Confirm to log time.
Note: Each hour entry can only be added from a range of 0-24 hours. Users will be restricted from adding a duration of more than 24 hours.
Editing & Deleting Time Entries
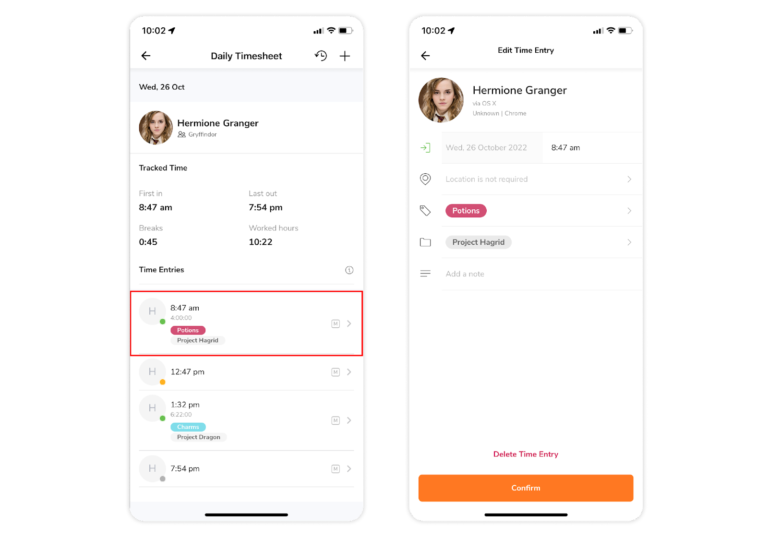
Time entries can be edited to adjust a timestamp or to change the details included such as activities, projects, and notes.
Steps to edit a time entry
-
Go to Timesheets.
-
Click on the calendar icon on the top right corner to choose a particular day you wish to edit a time entry for.

-
Click on Done.
-
Select a member on the Timesheet list.

-
Locate the time entry to be changed.
-
On the detailed time entry, change the details as needed.

-
Click Confirm when you are done.
-
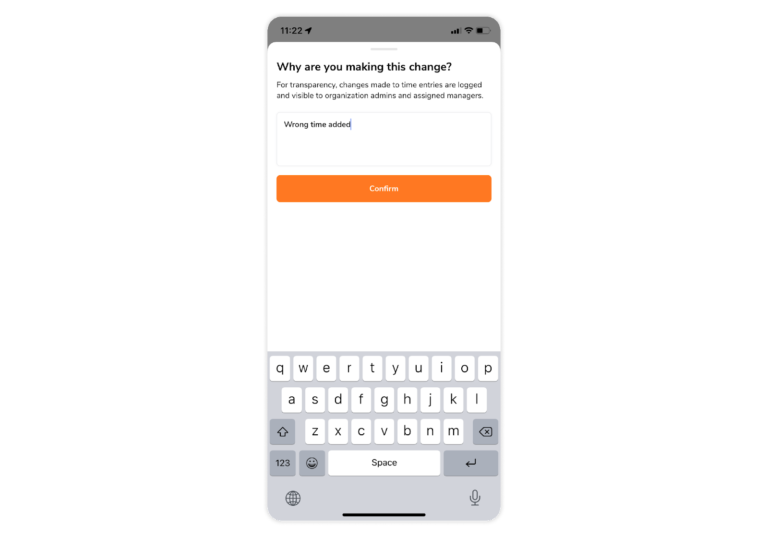
To keep track of changes made, specify a reason for making this change.

-
Click on Confirm for the change to take effect.
❗️ Important: Changes made to time entries will be recorded under “Change History” on daily timesheets and are visible to your managers.
Steps to delete a time entry
-
Go to Timesheets.
-
Click on the calendar icon on the top right corner to choose a particular day you wish to delete a time entry for.
-
Click on Done.
-
Select a member on the Timesheet list.
-
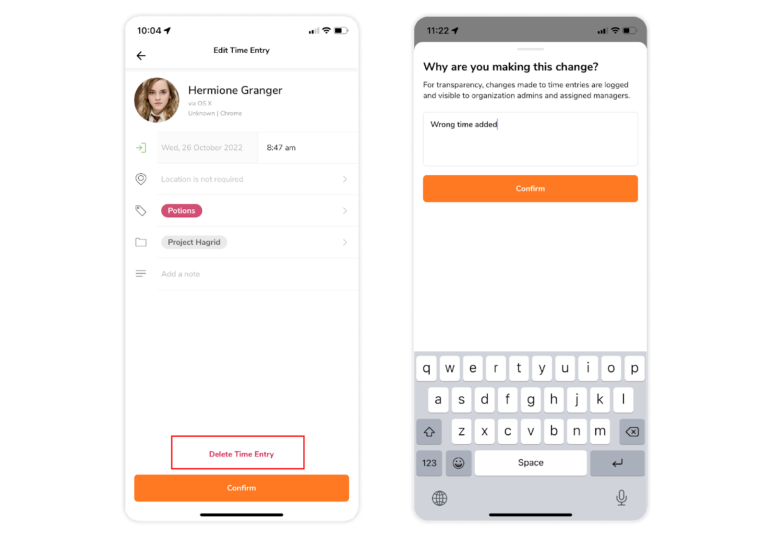
Locate the time entry to be deleted.
-
Click Delete Time Entry.
-
To keep track of changes made, specify a reason for making this change.

-
Click on Confirm for the change to take effect.
❗️ Important: Deleted time entries will not be included in calculations but will still be visibly marked in timesheets unless a member is permanently deleted.

