Roles and permissions in Jibble
The differences between members, managers, admins, and what they can / cannot do.

There are three different roles that a user can be assigned to: Admin, Manager, and Member. Each role has its own different function and set of permissions.
This article covers:
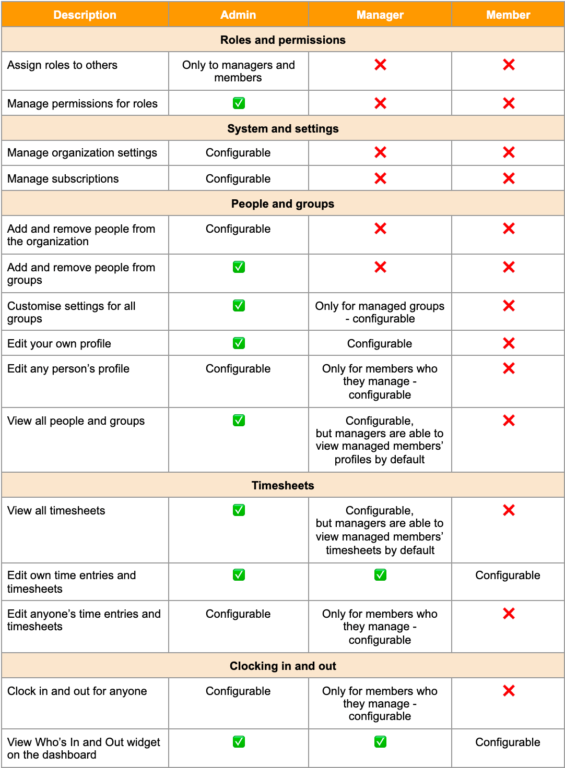
Here’s a table of the default settings per role:
The different roles explained
Owner:
Every organisation has one organisation Owner who is the creator of the organization. The owner is a “super user” and has access to change everything in the organisation. Owners can never be removed.
If you need to change ownership of the team, shoot us a message.
Admin:
If you have employees that basically need the same permissions as the owner, it makes sense to turn them into an admin. By default admins can:
-
Add, edit and delete all team members in the organization
-
Add, edit and delete all time entries (timesheets) of all team members in the organization
-
Make changes to organization settings
These permissions can also be customized from someone’s individual profile (see below).
Member:
“Normal” members are your staff members that need to clock in and out in the way that you want them to. Rules and restrictions set up in Policies under Time Tracking settings apply to all these team members.
Manager:
Members can be “Managed By” Managers. By default, managers are able to:
-
Make changes to the groups they manage by customizing the group settings.
-
Make changes to their team members they manage by editing their information details only.
-
Make changes to their team members’ time entries they manage by adding, editing and deleting their timesheets, including clocking and out for them.
-
Make changes to the groups they manage by customizing the group settings
Alternatively, these settings are also configurable under the manager’s individual profile settings if you need a specific manager to have more permissions.
Customizing default role permissions
All roles have a default set of permissions (see table above).
If you want to customize these default permissions for all managers and/or members, go to Organization settings > Permissions tab.
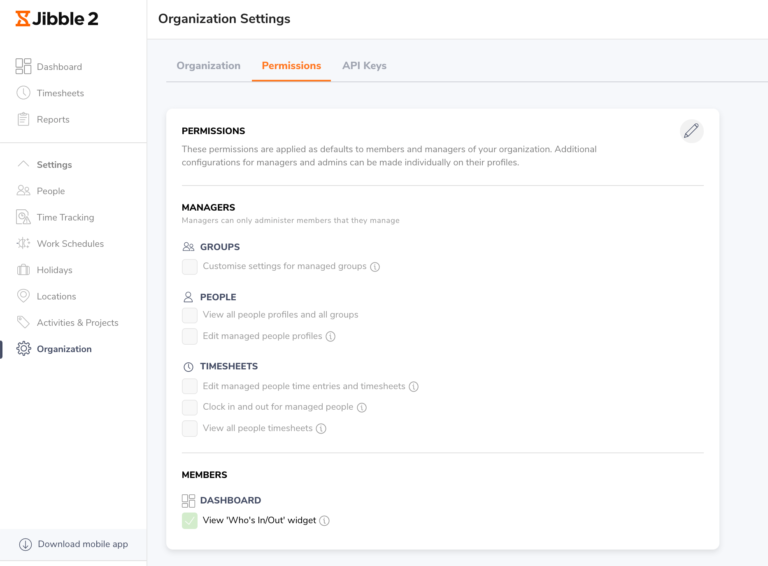
Customized default permissions apply to all people that have that role unless the permissions are individually overridden. (see “customizing individual permissions” below).
Changing someone’s role
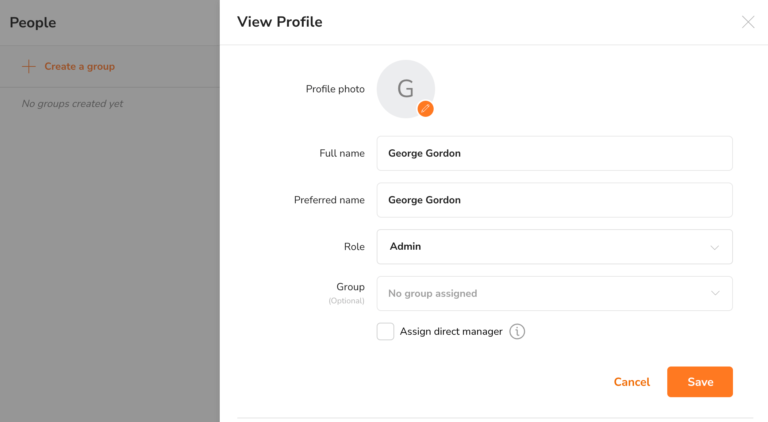
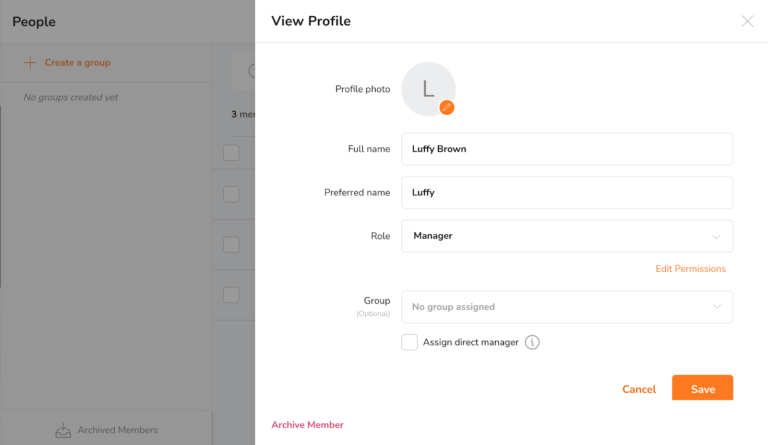
You can change someone’s role on their profile page.
-
Go to People > Click on the user’s name
-
Hit the pencil icon next to the user’s name to edit and go to “Role”
-
Change the role and hit “Save”
In the example above, this user would now be an Admin.
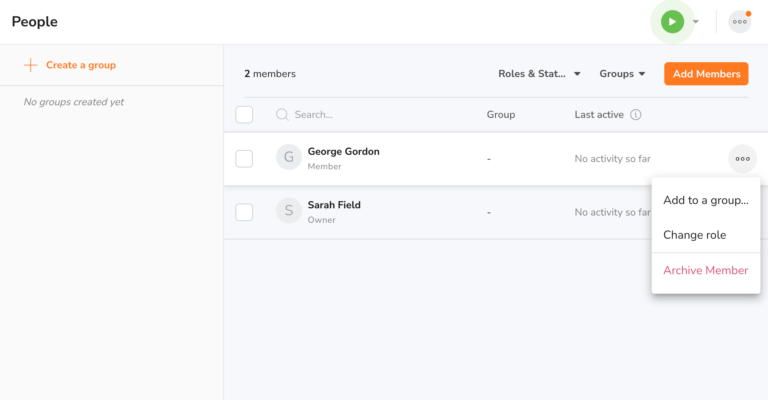
Or you can change someone’s role on the People page.
-
Go to People > Search for the user’s name
-
Hover on the person’s row
-
Click on the three-dot icon at the end of the row
-
Click “Change role”
-
Change the role and hit “Confirm”
Customizing individual permissions
You can customize an individual’s specific permissions by going to their profile page. You are only able to do this for a manager or an admin and this feature is only available for the Ultimate plan. Depending on their role, you’ll have different options.
Manager:
-
Go to People > Click on the user’s name with a manager role.
-
On the person profile, under Role, click on “edit permissions”.
-
Click on the checkboxes that you want your manager to have permissions for.
-
Click “Confirm” to save the changes made.
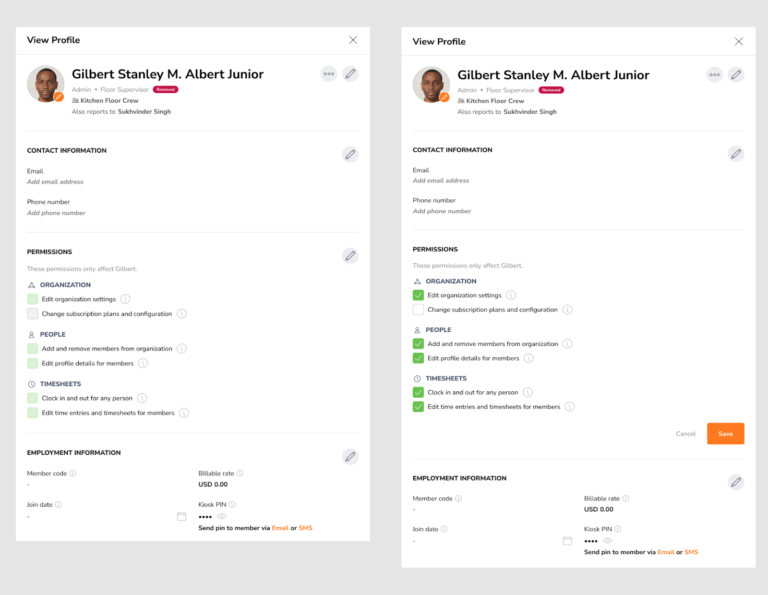
Admin:
-
Go to People > Click on the user’s name with an admin role.
-
On the person profile, you will see a Permissions section.
-
Click on the pencil icon, and click on the checkboxes that you want your admin to have permissions for.
-
Click “Save” to save the changes made.